Authentication
OIDC Authentication
VNS3 Licensing
Access Management
Clientpack Generation
Installing HTTPS
Firewall 2.0
Firewall
AWS Specific features
Firewall FWSets
VNS3 Variables
VNS3 Router
IPsec Configuration
IPsec Parameters
VNS3 Peering Mesh
Setting Topology Name
VNS3 Overlay Network
Snapshot Management
VNS3 Event Alerting
Network Address Translation
Traffic inspection
SNMP Support
VNS3 BGP Configuration Guide
Remote Support
Resetting VNS3
Upgrading
VNS3 Release Notes
VNS3 EOL Policy and Milestones
IPSec Connection Checklist
VNS3 Known Issues
VNS3 Specifications
VNS3 VPN Client tools
VNS3 Control Center
VNS3 setup
VNS3 Router
Routing
VNS3 allows you to configure Routes to allow a Controller to point to subnets not explicitly included in the IPsec or Overlay configurations. These routes can be automatically shared between other Controllers included in the topology via the Peering mechanism, and with Overlay Network connected devices.
There are two types of routes:
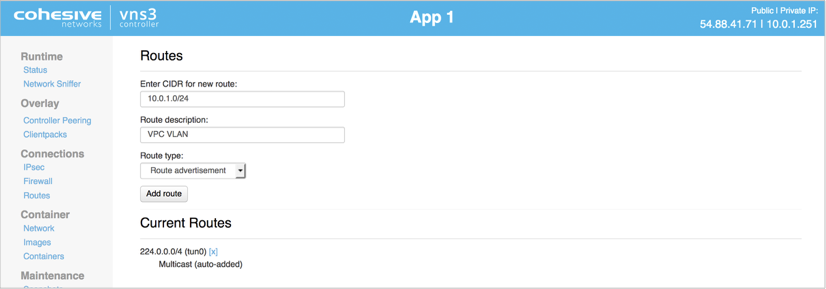
- Route Advertisement - Simple route that tells all Overlay Network participants a certain CIDR destination is available through the VNS3 controller.
- Interface Route - More complex route that also tells all Overlay Network participants a certain CIDR destination is available through the VNS3 controller but also allow configuration of the interface on the VNS3 controller where this is available and an optional Gateway IP.
Creating a route advertisement:

Creating an interface route:

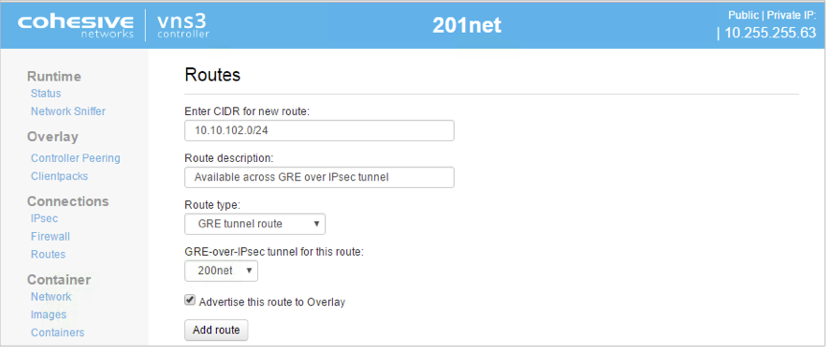
GRE Tunnel Route - GRE routes are a specialized subset of an “Interface Route”. When there are route-based, site-to-site connections, established with GRE, those will be available for routes. Since the actual interface address of a GRE tunnel is not significant, the name of the tunnel which is routing encapsulated GRE traffic is shown, (“200net” in following example). Like “Interface Routes”, the route can be advertised throughout the overlay by selecting the “Advertise route to Overlay” checkbox.

Adding a route to 0.0.0.0/0
Sometimes it is necessary to make a route to 0.0.0.0/0.
If done improperly this can make your VNS3 Controller INACCESSIBLE and IRRECOVERABLE.
There are very solid and specific use-cases for this, but proper route sequencing must be followed.
In summary - you are replacing the VNS3 default gateway and telling it all traffic should go to that interface/gateway pair EXCEPT traffic to more specific routes.
To prevent losing access to your controller it is advised that you also have UI or API desktop to the controller from another host in the same specific subnet as the VNS3 controller.

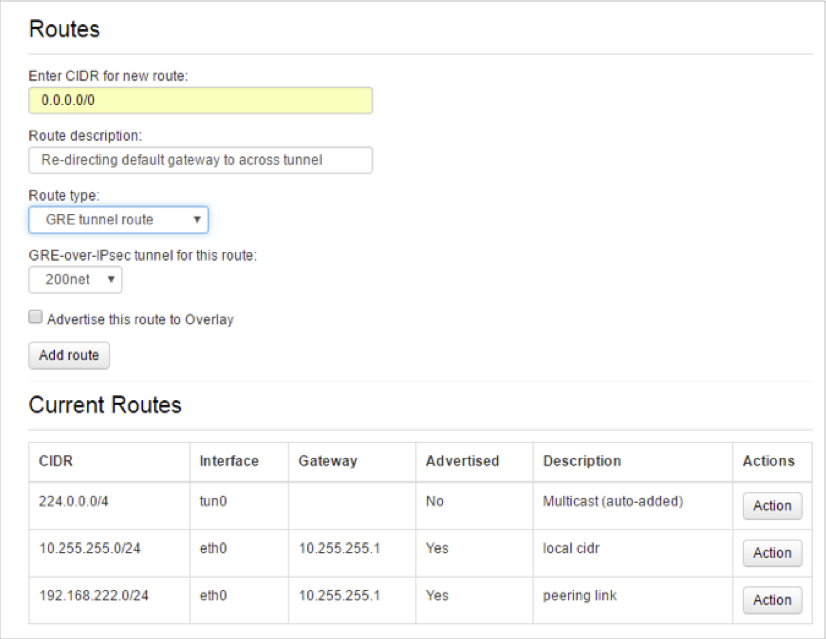
In this example (from AWS, but basic approach required at Azure, Google, etc.), a 0.0.0.0/0 route is about to be entered.
BEFORE HITTING “Add Route” Ensure you have made an Interface Route to your VPC/VNET/Subnet gateway. In the example this is 10.255.255.0/24 with a gateway of 10.255.255.1. (There are too many variables and distinctions for VNS3 to do this for you. You MUST provide the information!)
If you have “peered” VPC/VNET/Subnets when you redirect the default gateway your peering via the cloud infrastructure will drop UNLESS you have a route(s) to the peered subnet(s) explicitly specified. In the example this is the Interface Route to 192.168.222.0/24 with the gateway of 10.255.255.1 (my VPC gateway).
In this example the route to “0.0.0.0/0” is seen as across a GRE tunnel route.
If the topology changes such that a re-directed default route is no longer needed, you can delete it via the “Action” menu on the “Current Routes” display table.
When the new default route was added, VNS3 saved the original gateway setting, and this setting will be used for the default gateway. You DO NOT need to delete the routes you used to inform VNS3 of the local subnet CIDR, nor any peering routes. However, since the default route is now directed to your underlying subnet gateway, you do not need to keep them.
Updated on 24 Apr 2020
