VNS3 PeopleVPN
Table of Contents
Introduction
VNS3 PeopleVPN is a custom, pre-configured version of Cohesive Networks VNS3 network and security controller. VNS3 PeopleVPN base edition allows up to 10 team members to connect over secure and private VPN tunnels to each other and to AWS/Azure/Google/etc.. cloud-based resources for free. Additional connections can be licensed from Cohesive Networks. VNS3 PeopleVPN can also be configured as a NAT Gateway instance for additional security and visibility.

Firewall Setup
VNS3 PeopleVPN instances launched via the Cloud Provider Marketplaces will have the security groups already open for inbound traffic from 0.0.0.0/0 on the following ports as part of the listings. IF your VNS3 PeopleVPN instance is launched via private AMI or Image sharing, you will need inbound security group rules opened for the following ports.
- TCP port 8000 - VNS3 PeopleVPN HTTPS UI and API access port. Open inbound access from any IP you want to access the VNS3 UI or API from.
- UDP port 1194 - For client VPN connections; must be accessible from all servers that will join VNS3 topology as clients.
Static IP
We highly recommend associating a static public IP or Elastic IP to your VNS3 PeopleVPN controller instance. This provides flexibility in the event you need to upgrade or if there is an underlying cloud failure.
NOTE: If you add the static IP after the VNS3 PeopleVPN is launched, reboot the instance via the UI and access the UI via the newly associated static public IP.
Getting Help
VNS3 PeopleVPN comes with free forum support that is provided on a best effort basis.
At Cohesive Networks we pride ourselves on the quality support we provide to our users and customers. We want to make sure you have all the materials to be independently successful with VNS3. In cases where you do need help, don’t hesitate to create a forum post and a member of our Support Team will respond.
If you need additional support outside of the capabilities provided by our free forum, we are of course happy to help but a commercial agreement may be needed. Feel free to contact us and we can review our premium Support Plans.
Remote Support
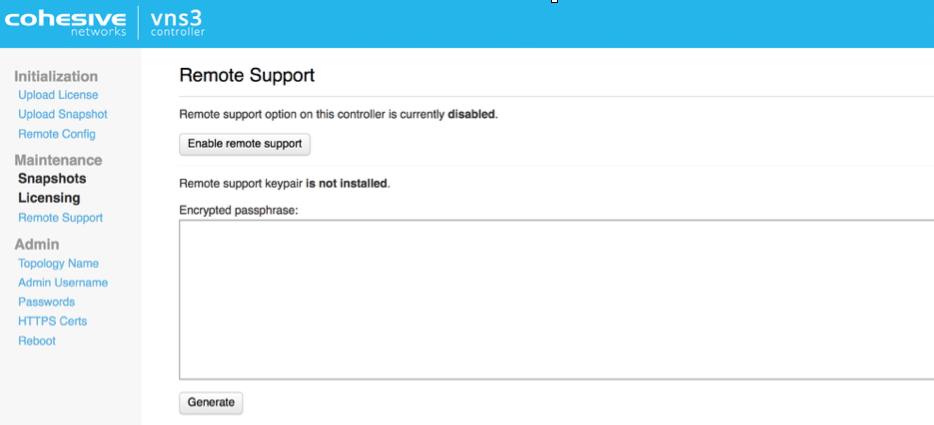
In the event Cohesive needs to observe runtime state of a VNS3 Controller in response to a tech support request, we will ask you to open Security Group access to TCP port 22 (SSH) from our support IP, 54.236.197.84, and Enable Remote Support via the Web UI.
Note that TCP 22 (ssh) is not required for normal operations.
Each VNS3 Controller is running a restricted SSH daemon, with access limited only to Cohesive for debugging purposes controlled by the user via the Remote Support toggle and key exchange generation.
Cohesive will send you an encrypted passphrase to generate a private key used by Cohesive Support staff to access your Controller. Access to the restricted SSH daemon is completely controlled by the user. Once the support ticket has been closed you can disable remote support access and invalidate the access key.
Step 1: Login
AWS Login Information
- VNS3 Web UI - https://VNS3-ip:8000 (e.g. https://123.123.123.623:8000)
- Default UI username - vnscubed
- Default UI password - instance id (e.g. i-0d9098dc28f8229b)

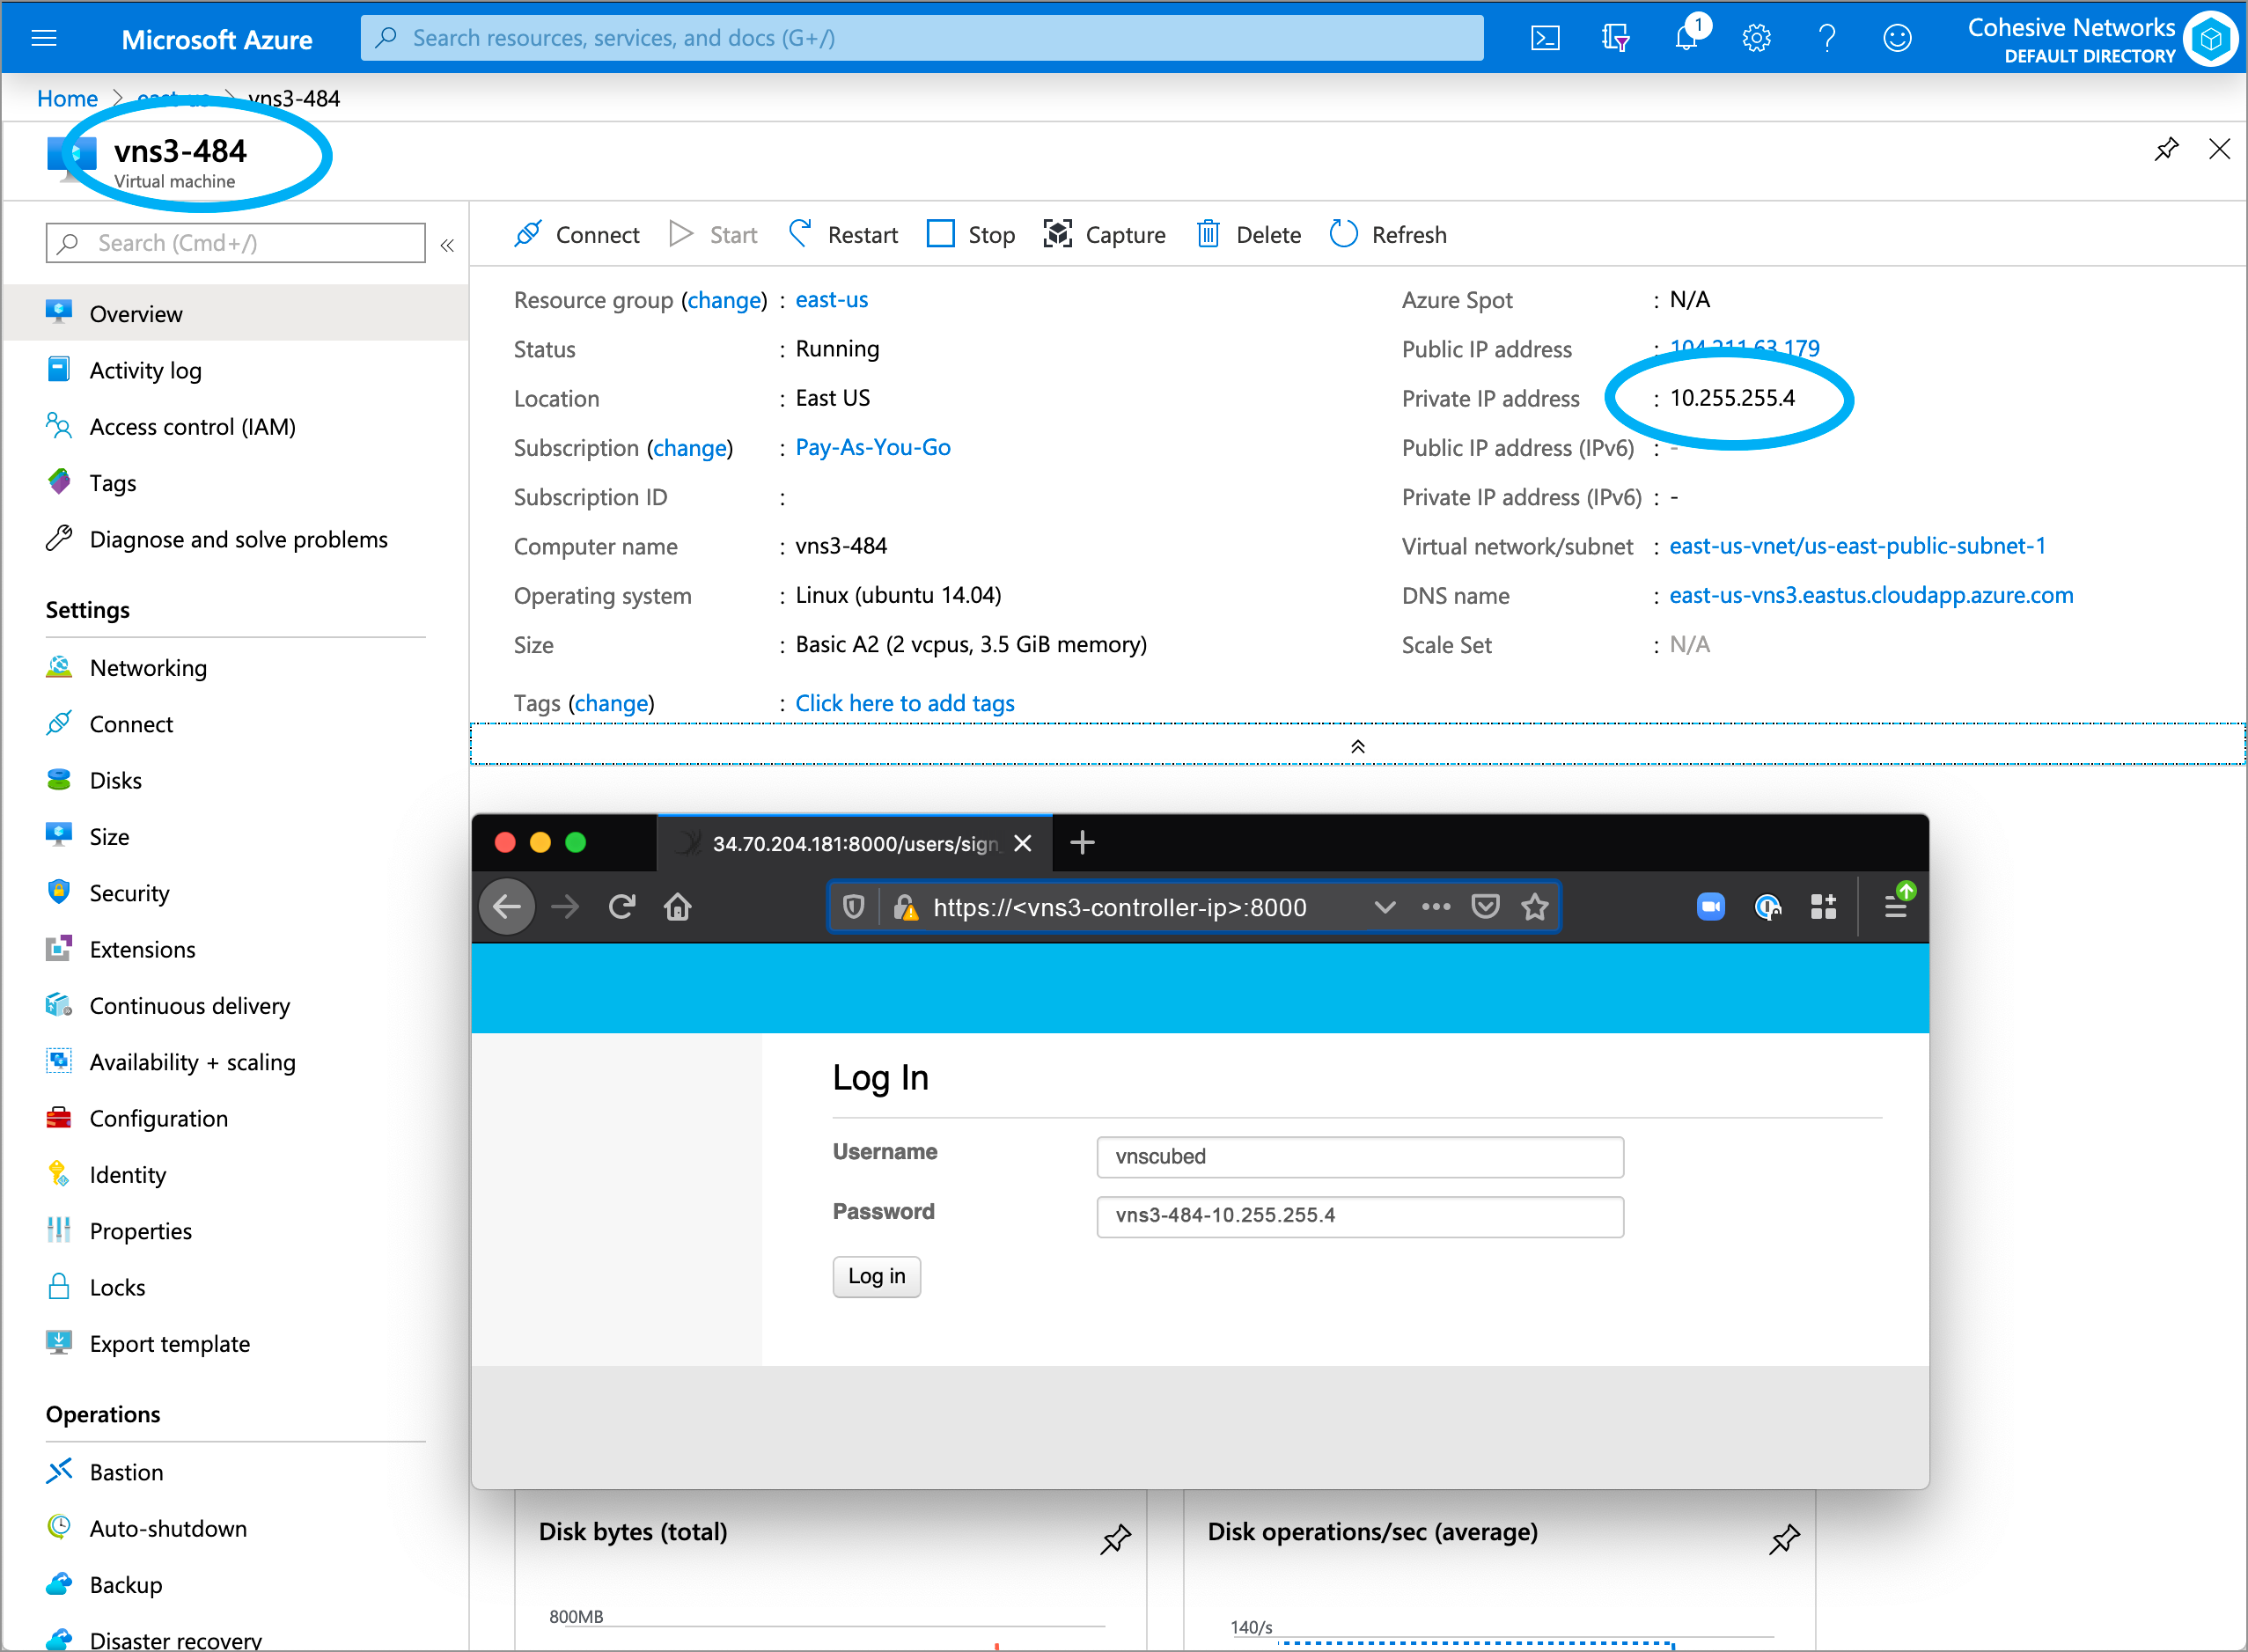
Azure Login Information
- VNS3 Web UI - https://VNS3-ip:8000 (e.g. https://123.123.123.623:8000)
- Default UI username - vnscubed
- Default UI password - VNS3_VM_name-VNS3_private_IP (e.g. vns3prod-10.0.0.5)
- (In legacy versions prior to 4.4.0, the default password in Azure is “vnscubed”.)
Reset Default Passwords
Reset your passwords: Reset the Web UI Password - Even though the instance id is unlikely to be “guessed”, please change it for security purposes. Reset the API Password. Making it a different password than the web interface is probably best.
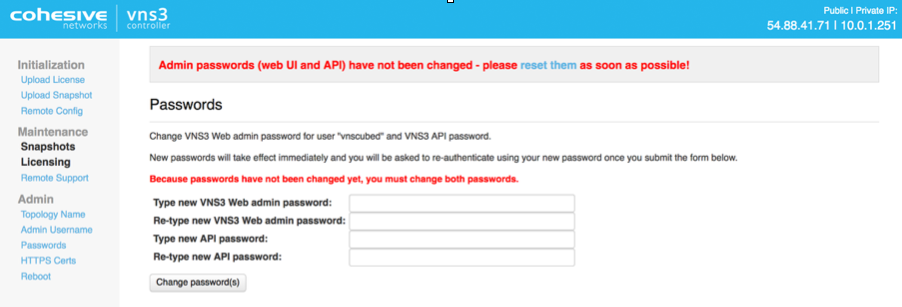
NOTE: Your VNS3 Controller answers to API calls on the same port 8000 as the web interface runs on. Ideally make a separate password for the API usage against the Controller.
Cohesive does not have any key access or remote access to your VNS3 Controllers unless provided by you. If you forget these passwords we cannot recover them for you but in AWS you can recover via User Data.
Step 2: Review Overlay Network
About the Overlay
The VNS3 Overlay Network is the enabling feature for remote-access VPN. The Overlay Network is made up of a set of cryptographic keys (uniquely generated on your VNS3 PeopleVPN instance) that are tied to a specific IP address in the Overlay Network Subnet - 100.127.255.0/24 default. Clientpacks are distributed to the remote devices and used with an OpenVPN client (TLS client) to make an encrypted connection back to the VNS3 PeopleVPN controller instance. Communication to other remote-access VPN devices, local cloud CIDR, remote networks, and public Internet can also be optionally routed through VNS3 PeopleVPN depending on your use-case.
Preconfigured Overlay
VNS3 PeopleVPN instances are completely initialized with unique Overlay client credentials generated on first boot. This allows for simpler and faster deployment.
In order to provide this preconfigured functionality, Cohesive Networks has selected a small Overlay Network CIDR from the Carrier Grade NAT reserved address space of 100.64.0.0/10 (RFC 6598). This preconfigured Overlay Network usually ensures no overlap with the underlying cloud network configuration or remote networks that will connect via VNS3 VPN functionality.
Preconfigured Overlay Network for the VNS3 PeopleVPN is 100.127.252.0/22.
Customizing the Overlay Network
In situations where a different Overlay Network is desired follow the steps outlined in the Reset Defaults section of this guide.
Step 3: Setup Routes
VNS3 allows you to configure Routes to allow a Controller to point to subnets other than the Overlay Network. When a remote client device connects to the Overlay Network for remote-access VPN, routes are pushed to that client device by OpenVPN.
NOTE: Routes to the Overlay Network are pushed automatically by default.
Adding Routes to the VNS3 PeopleVPN controller instance allow you to provide additional connectivity to other subnets/IP ranges the VNS3 PeopleVPN controller can access. The most typical configuration is including route(s) to the cloud VPC/VNET CIDR(s) where the VNS3 PeopleVPN instance is running. This allows the remote devices connecting to the Overlay to access cloud-based assets via their private IPs through the VNS3 PeopleVPN controller. Be sure to add the reciprocating route in that VPC/VNET to your overlay network with the VNS3 controller as the gateway(next hop).
There are two types of routes:
- Route Advertisement - Simple route that tells all Overlay Network participants a certain CIDR destination is available through the VNS3 controller.
- Interface Route - More complex route that also tells all Overlay Network participants a certain CIDR destination is available through the VNS3 controller but also allow configuration of the interface on the VNS3 controller where this is available and an optional Gateway IP.
To add connectivity to your cloud network, create a route advertisement and specify the VPC or VNET CIDR:
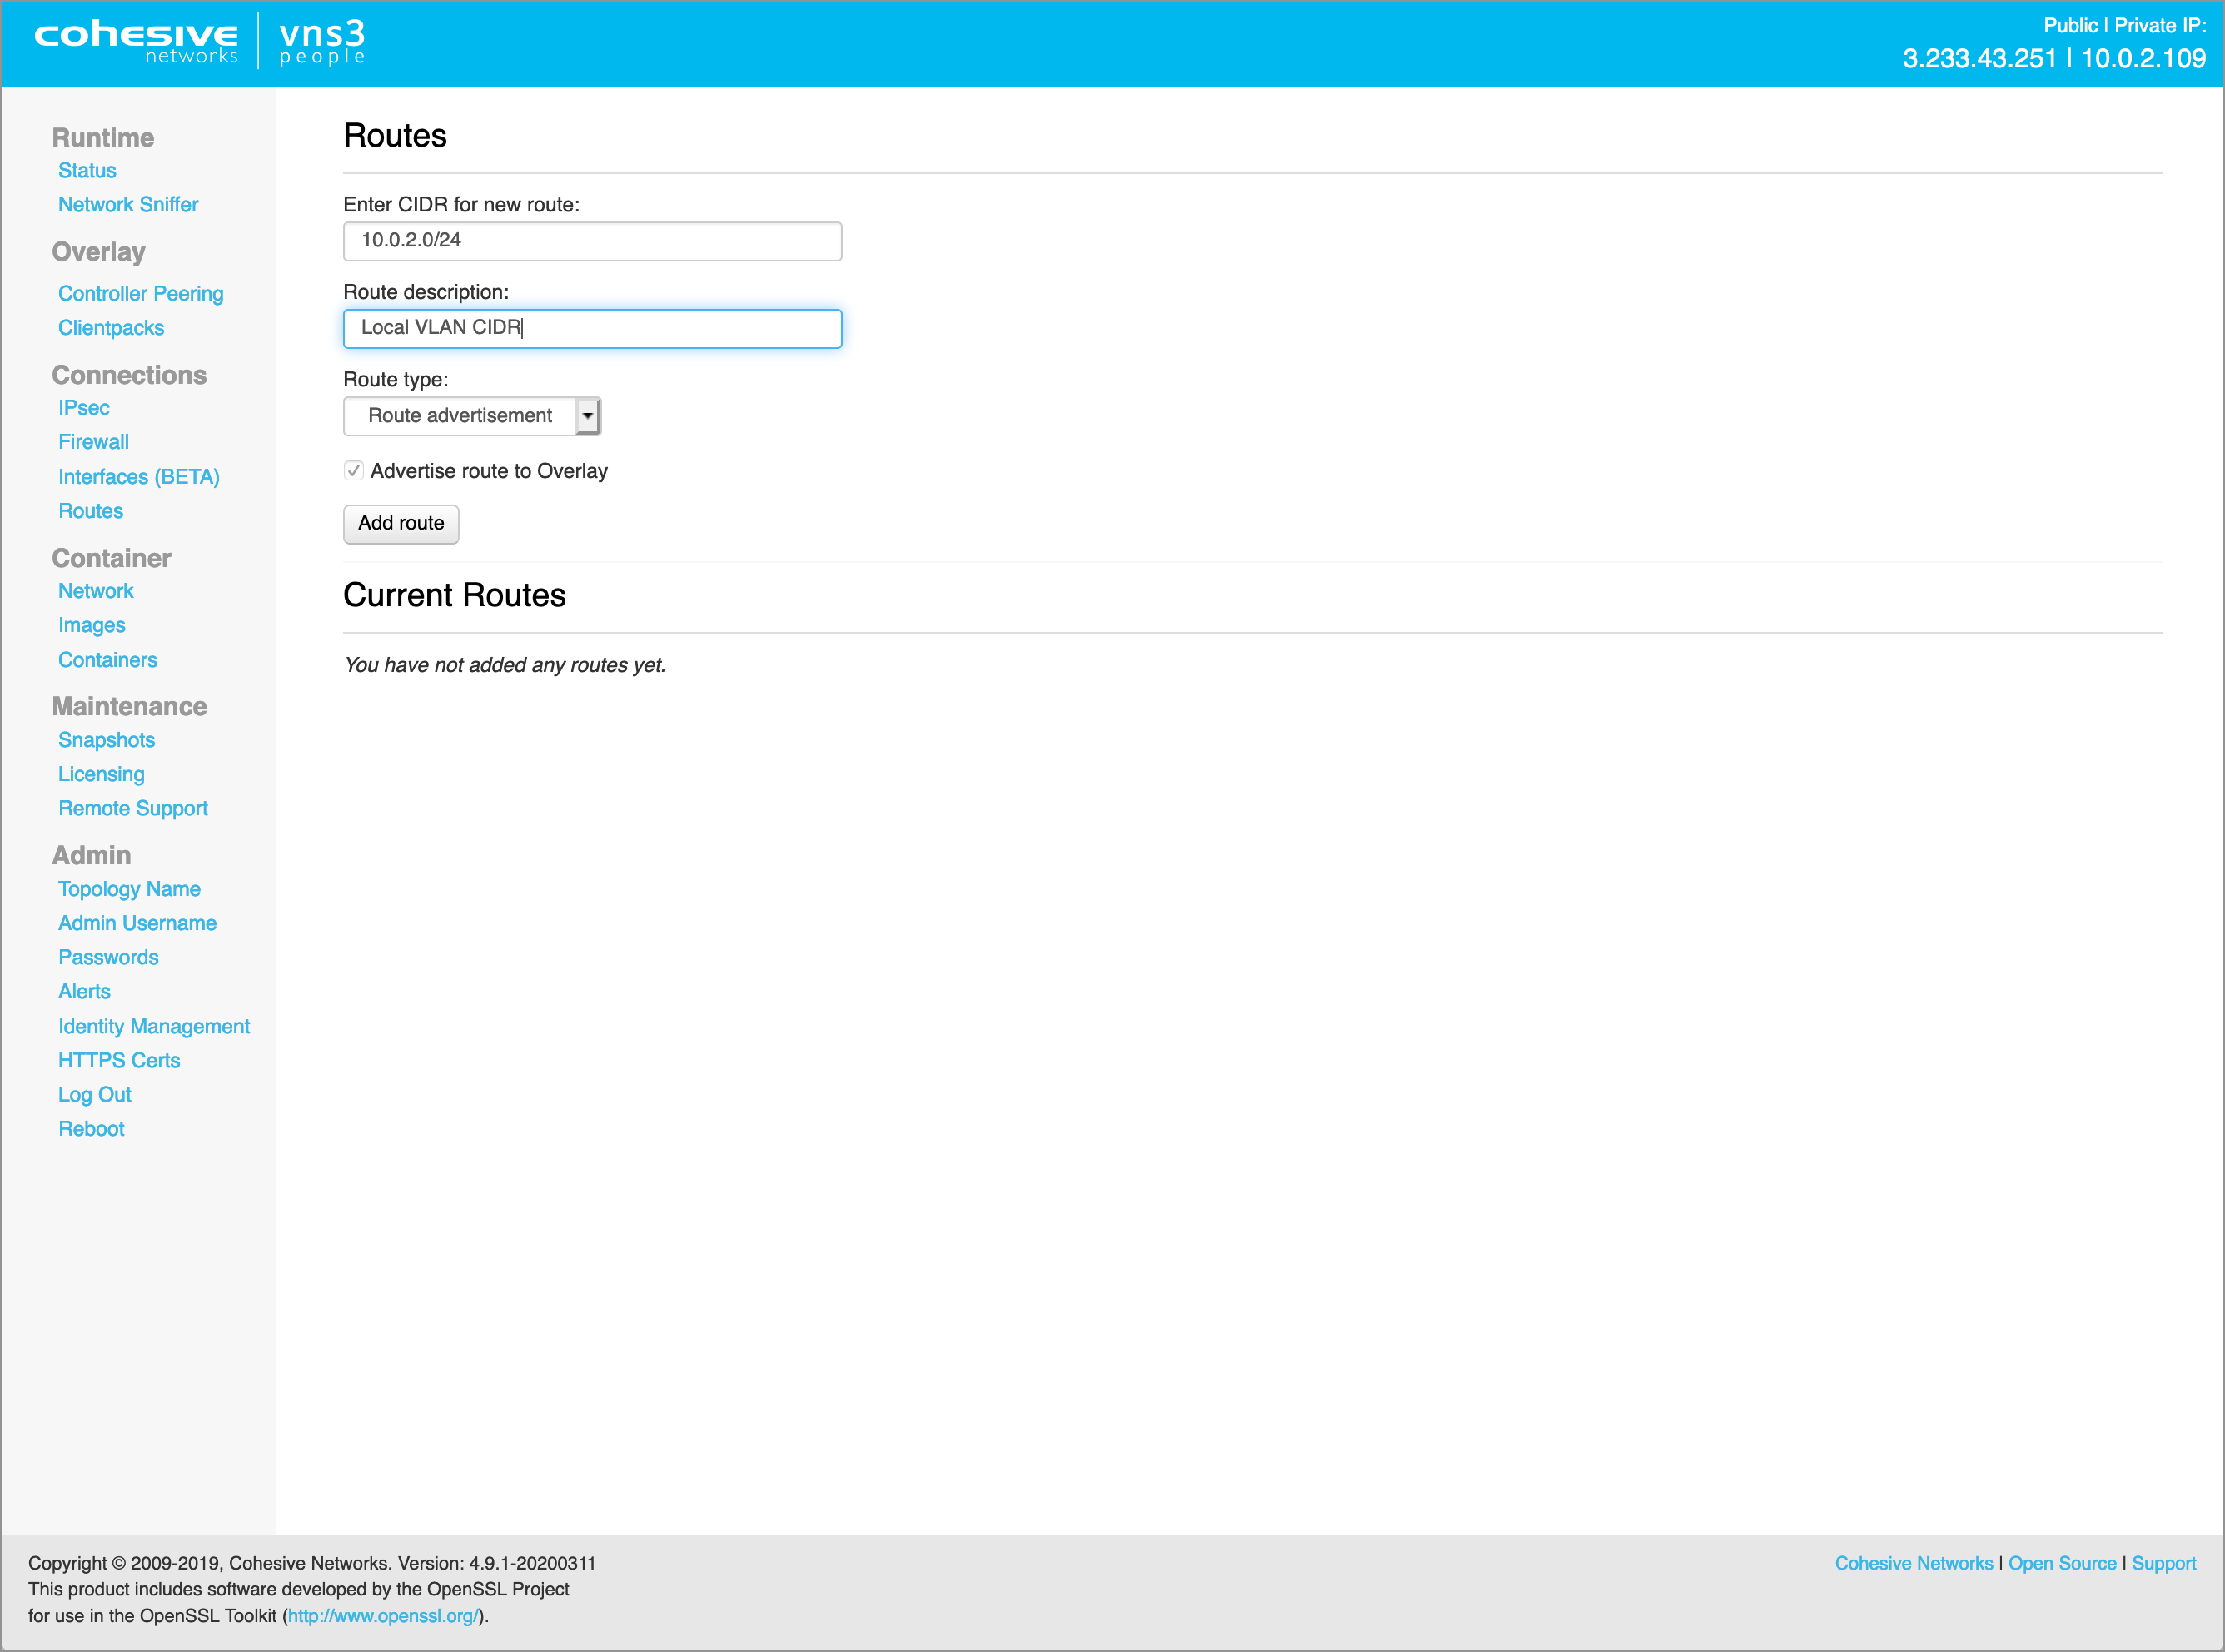
NOTE: Add routes before setting up client configurations as OpenVPN only pushes routes during initial client connect. Cohesive Networks does have a Routing Agent that is available for dynamic route updates to remote access clients.
Step 4: Configure Firewall
The VNS3 firewall allows users complete control of the INPUT, OUTPUT, FORWARDING, PREROUTING and POSTROUTING behavior of traffic as it first enters and as it exits the VNS3 PeopleVPN controller.
The VNS3 internal firewall is still there to “protect” the internal mechanisms of VNS3, however, customer rules can be created that have undesirable effects. Essentially rules that ACCEPT or REJECT/DROP all traffic are likely to create a device that is un-reachable or one that is too permissive in accepting traffic.
Customer rules are evaluated and if there is not a match in the _CUST chains, then they flow through into the interior VNS3 chains which are quite restrictive. Accepting all traffic prevents most of the interior rules from being evaluated which might block unsafe traffic. Blocking all traffic prevents most of the interior rules from being evaluated which accept necessary traffic such as the API and WebUI management utilities. (Blocking port 8000 from all traffic will make the VNS3 instance un-manageable.)
Below are some example firewall rules common to this remote access use-case.
-
Drop any traffic between remote access clients on the Overlay Network. This still allows the remote access VPN clients to access the cloud network but not each other. NOTE: There are some use-cases where the remote access clients do need to communicate with each other, and in that case, this rule is not needed.
FORWARD_CUST -s 100.127.252.0/22 -d 100.127.252.0/22 -j DROP
-
Allow remote access clients on the Overlay to access the Internet through the VNS3 PeopleVPN via NAT. This can be extremely useful to make all remote access Overlay Network clients to access the Internet from a common IP address (VNS3 PeopleVPN Public IP), making whitelisting of your remote team much easier.
POSTROUTING_CUST -o eth0 -s 100.127.252.0/22 -j MASQUERADE-NCE FORWARD_CUST -s 100.127.252.0/22 -d 0.0.0.0/0 -j ACCEPT
FORWARD_CUST -s 0.0.0.0/0 -d 100.127.252.0/22 -j ACCEPT
This image shows the default PeopleVPN firewall.

Step 5: Connect Clients
Step 5.1: Send Clientpack File to Remote User
In order to connect client devices to the Overlay Network for remote-access VPN, the remote device will need a Clientpack file and an OpenVPN client.
- A Clientpack can run on a single client at a time.
- If you shut down or disconnect client from the topology, you can reuse its Clientpack.
- VNS3 PeopleVPN includes 35 Clientpacks.
Click on Clientpacks in the left column menu to see a list of Clientpack credentials.
The Clientpacks page displays all the available Clientpacks in a table displayed below the global options. Clientpacks are named for their Overlay Network IP association.
Select a Clientpack and send the credential to the remote user.

Step 5.2: Configure Remote User Device
Install any OpenVPN client software on the remote device. We like Viscosity, it is high quality and reasonably priced. You can also use the OpenVPN Community client free of charge.
WARNING: If you accidentally give the same client credentials to 2 different devices you will notice the two clients popping off and on the overlay network inside the VNS3 Controller Status screen. Only one device can have a set of credentials in the same topology at a time.
Windows Overlay Client Configuration
Viscosity
- Install Viscosity per the Installing and Running Viscosity documentation.
- Add the Windows Clientpack ovpn file to the Viscosity configuration per the Importing A Connection documentation.
- Click connect and confirm the VPN tunnel is negotiated and secure network extent has been established.
OpenVPN
- Select the correct OpenVPN installer for your version of Windows.
- Download and open as Administrator. Make sure to also install the TUN/TAP Adapter as that is required in order for the Windows Network Stack to create the layer three tunnel virtual interface.
- Once the OpenVPN Client is installed, move the Windows Clientpack .ovpn file to \Program Files\OpenVpn\config\
- Start openvpn via the services tool or OpenVPN GUI.
Once connected, your Windows client will get a TUN/TAP interface with the virtual IP address that corresponds to the clientpack it received.
Adjust local firewall on the client if necessary.
Apple OSX Overlay Client Configuration
Viscosity
- Install Viscosity per the Installing and Running Viscosity documentation.
- Add the Linux Clientpack .conf file to the Viscosity configuration per the Importing A Connection documentation.
- Click connect and confirm the VPN tunnel is negotiated and secure network extent has been established.
Once connected, your OSX client will get a TUN interface with the virtual IP address that corresponds to the clientpack it received.
Linux Overlay Client Configuration
OpenVPN
- Install OpenVPN on linux distros (CentOS, Redhat, Fedora, SUSE) that support RPM by following the OpenVPN RPM Documentation and on linux distros that support APT (Ubuntu, Debian) by following the OpenVPN APT Documentation.
- Add the Linux Clientpack .ovpn file to the /etc/openvpn directory (consult OpenVPN documentation for your OS if not found).
- Start openvpn. On Linux OSs this is done using /etc/init.d/openvpn start, service openvpn start, systemctl start openvpn@
.service, or similar command depending on your OS disto.
Your Linux client will get a TUN interface with the virtual IP address that corresponds to the clientpack it received.
Adjust local firewall on the client if necessary (on Linux, your tunnel device name will be tun0).
Once remote access users connect to the Overlay, the VNS3 PeopleVPN Runtime Status page will display the connections.

Recommended Best Practices
- Include remote user information with the the “name” value tag on Clientpacks. This will allow you to better track who is connected via the Runtime Status page or Clientpack page.
- Disable any Clientpack not current distributed to a remote user/in use. This will ensure only your active users are joining the Overlay Network.
- Regenerate any Clientpack that is lost or was in the possession of a remote user that is no longer with the team. This is the equivalent of a certificate revocation list.
- Utilize the VNS3 Firewall to filter traffic for your particular use-case. This could mean either explicitly allowing or rejecting/dropping traffic between remote users via the Overlay Network.
- Assign a static public IP (Elastic IP or similar) to your VNS3 PeopleVPN instance for additional flexibility during upgrades or DR.
Useful Links
- VNS3 Administration Document - Learn more about your VNS3 PeopleVPN features and functions like Firewall, Routes, Snapshots, and more.
- VNS3 Plug-in Container Guide - VNS3 PeopleVPN includes the capability to run one (1) Plug-in as part of the license. Learn more about how that can help you achieve your Remote Work and broader cloud goals.
- VNS3 Network Security Plug-in Marketplace - List of some free curated L4-L7 Network Service Plug-ins.
Appendix: Clientpack Page Details
There are several broad operations at the top of the page, which have an impact beyond the individual operations allowed on each clientpack below via the “Action” menus.
Enable all | Disable all
Selecting one of these options will change the clientpack state for ALL client packs in the topology - even if connected to other controllers.
Extra Clientpack Policies
This allows specific clientpack policies that not the default to be applied to the configuration file of all clientpacks - on THIS CONTROLLER only. Clientpack policies intentionally do NOT replicate between controllers, allowing distinct control of the configurations per controller. This feature is primarily for organizations doing manual controller configuration as opposed to modifications normally done using Dev Ops / Automation tools.
Show Security Token
NOTE: This value was previously hidden and required Cohesive to recover from a controller. Toggling this link will show the security token/passphrase used when the clientpack generation was done - using the “Generate New” option in initial controller configuration. This value, combined with cloud security group settings, and VNS3 licensing allows a controller to join this topology.

Clientpack Table
- Clientpack - This is the name of the clientpack. It is the associated Overlay IP address with the “.” Replaced by “_”.
- Status - Displays whether the clientpack is connected to a controller or not.
- Enabled- Displays whether the clientpack is allowed to connect to the controller. If disabled a connection is NOT allowed.
- Checked Out- Displays whether clientpack available or currently being used (checked out). If state is “checked out” this will prevent get_next_available_clientpack API call from offering the clientpack.
Config Files Clientpacks are available as a single configuration file optimized for Linux (vnscubed.conf) and Windows (vnscubed.ovpn). These files have the certificates and keys needed for connecting to the Controller embedded within them.
- Last Connect - Displays the UTC date/time of the last time this clientpack connected to this controller.
- Last Disconnect- Displays the UTC date/time of the last this clientpack disconnected from this controller.
- Tags- Tagging let’s you keep track of clientpacks based on name/value tagging. Use the “name” value to have the tag displayed on the Runtime Status Page.
Client Configuration: Clientpack Actions
From the Clientpack Page click on the Action menu for a particular credential to see the available actions that can be taken.

- Checkout - This toggle let you tag a Clientpack as available or being used (checked out) to keep track of the used credentials and to allow or prevent the API get_next_available_clientpack call from fetching a pack that is in use.
- Enabled - This toggle let’s you choose to enable or disable the Clientpack. A disabled Clientpack will not be allowed to connect to the Controller.
- Tags - Tagging let’s you keep track of clientpacks based on name/value tagging. Use the “name” value to have the tag displayed on the Runtime Status Page.
- Regenerate Clientpack - Regenerating the Clientpack allows you to take an old, lost or compromised clientpack and delete the old record and generate a completely new and unique clientpack associated with the same address. This increases the usability of the Overlay Network for road warrior VPNs.
Client Configuration: Clientpack Policies
Clientpack policies are applied to the configuration files on the controller where specified. Changes DO NOT propagate (yet) to already deployed/connected clientpacks.
The customizations are to the client configuration files - not to the server configuration. In this way we are providing more custom control without potential risk to the server configuration.
### default XXX ### lines are system needed markers. IF they are there - VNS3 will update the configuration files to use the default inner and outer IP addresses of “eth0” or its equivalent on that controller.
If these markers are removed - when this controllers configuration is imported into a new instance for migration or recovery - there will then be not default addresses. This is useful for some automation use-cases.
PROS: This mechanism opens up some of the features for customizing connectivity from clients to the embedded OpenVPN servers used in VNS3 for machine-to-machine encryption.
CONS: The parameters are specific the OpenVPN server, and as such won’t “map” as we add IPsec client support, and Wireguard support for machine-to-machine encryption.
Here are some example use-cases/parameters for clientpack policies. NOTE: all of those are available via clientpack customization upon deployment outside the VNS3 controller and have been used by many customers for years.
float - this value allows you to assign a secondary private IP to the VNS3 “Local Private IP” setting, and allow clientpacks within the same VPC to connect on that private IP alias.
tun-mtu 8192
mssfix 0
fragment 0
This combination of settings raises the default MTU used for clients to 8192 bytes from the standard of 1500 bytes. This is an extreme performance boost in environments like AWS which support Jumbo Frames. Do not use this setting in environments without Jumbo Frames.
remote mydnsname.my.domain 1194 Customers might put the VNS3 controller in their own DNS, Public DNS, Cloud DNS and want to configure clientpacks to use that identifier. This would most likely be combined with removing the “### default” markers from the policy configuration.
dhcp-option DNS 10.x.x.x
dhcp-option DOMAIN mydomain.org
This makes use of the OpenVPN client parameter dhcp-option allowing common network parameters gotten from the network to also be retrieved for use in the encrypted overlay network.
The PeopleVPN has several default elements added to Clientpack Policies.
The default DNS server sent to the VPN clients is the Cloudflare 1.1.1.1 resolver.
Also, there is a setting “redirect-gateway def1” - this is OpenVPN client configuration to tunnel all traffic through the VPN. If you would like to change these by default - edit the clientpack policies via the link on the Clientpacks page BEFORE distributing clientpacks to VPN users. Subsequent changes are NOT automatically sent to client machines. Those same edits would need to be made by VPN users on their hosts. (NOTE: There are strategies for automating clientpack deployment and distributing updates, but that requires more elements than are covered here.)
This image shows the default clientpack policies entries (your “remote” line address should be the Public IP of your PeopleVPN controller).

Appendix: Reset Defaults (Optional)
As previously mentioned VNS3 Free and Lite Editions come preconfigured with a 100.127.255.192/26 Overlay Network.
There are some situations where you will need to use a different Overlay Networks address space for your specific use-case. Reasons could include but are not limited to, using a specific CIDR that fits with your organizational internal/external addressing requirements or increasing the size of the Overlay Network for growth future proofing.
This OPTIONAL section outlines the steps required when the preconfigured Overlay Network subnet needs to be changed.
Reset Overlay
Reset Factory Defaults removes all configurations, licensing and settings on a particular VNS3 Controller instance. The only configuration parameter that will remain is the username and password (both UI and API) set on the Controller instance at the time of the reset operation.
To Reset Factory Defaults navigate to https://
On the resulting page enter the code displayed to validate the reset and click Reset.
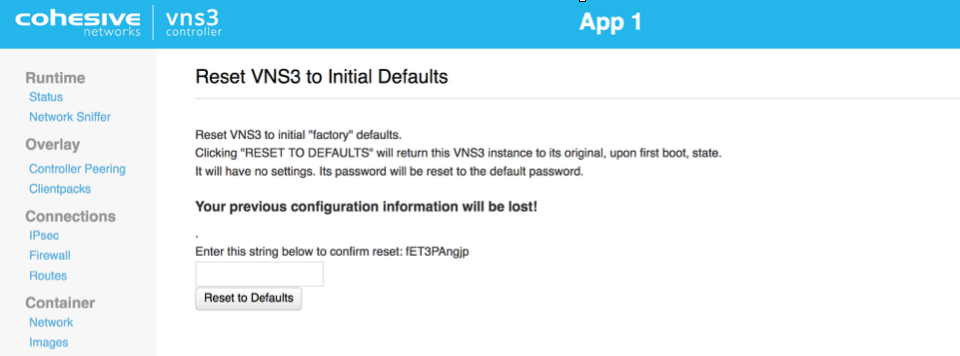
After Reboot, the Controller is reset and you can choose how to configure starting with Initialization.
Configure Overlay Network Address
WARNING: YOUR OVERLAY NETWORK RANGE CANNOT OVERLAP WITH THE CLOUD SUBNET/VPC/VNET.
The resulting screen allows you to choose the VNS3 Overlay Network to be used by your cloud-based client servers. Click the Custom Radio button to specify a custom subnet range.
The required fields are:
- Overlay Subnet CIDR (defines the range of addresses that will be available to your Overlay Subnet)
- Controller IPs (each Controller is a member of the Overlay Subnet on the specific addresses defined)
- “My Controller” VIP (an Overlay IP address used by the Controllers for peering and syncing)
- Client IPs (the actual IPs that will be available for your cloud-based Overlay Subnet client servers).
Once you complete this step, the Controller instance will reboot itself and will come up with your specified topology enabled and running.
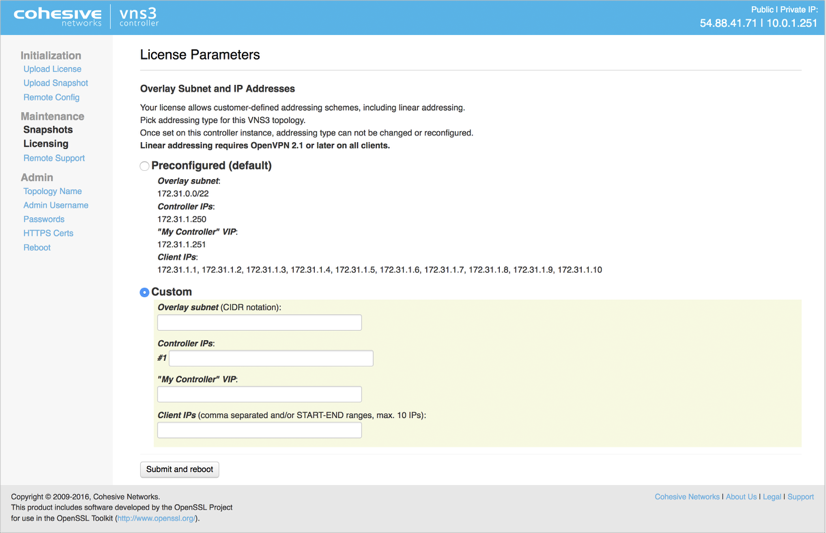
Click Submit and reboot.
Generate Keys on VNS3 Controller
The Controller is now configured to the License specs (how many Controllers it can peer with, how many clientpacks are available, and how many ipsec links are available).
The first step in Controller configuration is to generate the X.509 cryptographic keys associated with each Overlay Network IP called clientpacks. The clientpacks are used along with an SSL client (OpenVPN is recommended) to connect a client server to the Overlay Network using a specific IP address over an encrypted SSL tunnel. Click Generate New under Overlay in the left column.
During key generation you can specify a Topology name to be displayed in the Controller UI for a given set of peered Controllers. This can be changed at anytime by clicking on the Topology Name under Admin in the left column menu.
Also specify a security token. This can be anything but record this for future use as Controller peering and configuration fetching will require you to enter this again.

Click Generate keys link. Key generator will be started in the background, and you can refresh screen to observe progress.
Peering Controllers
Controllers connect to each other in a process called Peering. Peered Controllers create a redundant, highly available and secure overlay network and share traffic load from the overlay network connected servers.
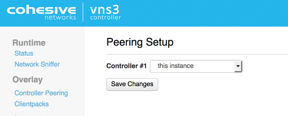
NOTE: Firewall rules added to a specific controller are not automatically synced to other controllers in the peered mesh. Click Controller Peering under Overlay.
The Peering Setup Page will display the number of Controllers allowed to peer together in your topology as defined by the license file used to configure the Controller.
For Controller #1 select “this instance” from drop down, instead of specifying its IP. To be valid, your form must have “this instance” value in one and only one drop-down.
If your topology has unused Controllers, leave the extra fields set to “not set”.
If you have a multiple Controller topology, enter the Public DNS address of the second Controller for Controller #2. Repeat this for each additional Controller in your topology.
When done select Save Changes.
Updated on 11 Mar 2020
